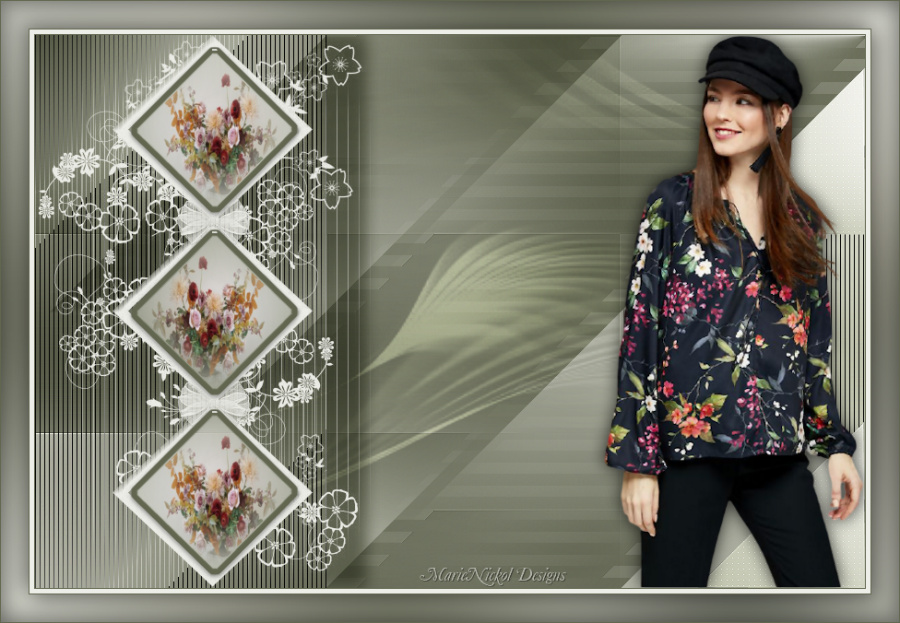
The Tutorial
Step 1
File - New - Open a new Transparent image 386 x 600 pixels
Rename this layer - Flower Mask
Flood fill tool /Fill in the Layer with the Background Color - color 2 ![]() #eeeee9
#eeeee9
Open mask - masktriple
Layers - New Mask Layer - From Image (Invert mask data not checked)
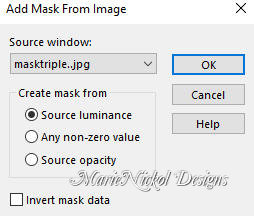
Layers - Merge - Merge Group
Step 2
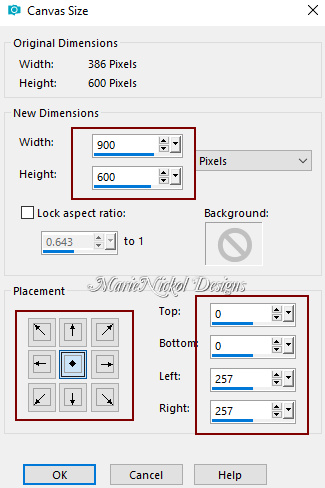
Image - Canvas Size
Width 900 px / Height 600 px / Placement Center
Step 3
Objects - Align - Left
Note: If you do not have the Command Objects on your version of PSP use the Pick Tool (K)
Activate the Pick Tool (K)![]() - Enter these values for positions X and Y on the Toolbar:
- Enter these values for positions X and Y on the Toolbar:
X 0.00 Y 0.00
![]()
Press M to release the Pick Tool
Step 4
Layers - New Raster Layer
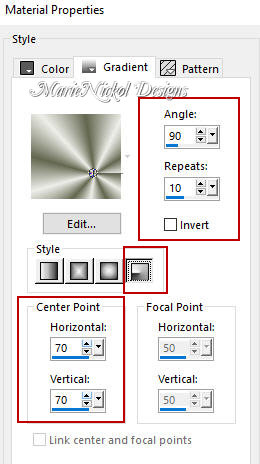
Flood fill tool / Fill in the layer with the Radial Style gradient prepared above - Angle 90 and Repeats 10
Layers - Arrange - Send to Bottom
Step 5
Close the eye of the top layer - Group - Flower Mask
Activate again the bottom layer - Raster 1
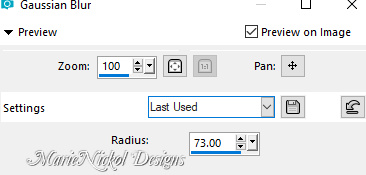
Adjust - Blur - Gaussian Blur (Radius 73)
Step 6
Effects - Plugins - Toadies - Weaver

or imported in Filters Unlimited 2.0
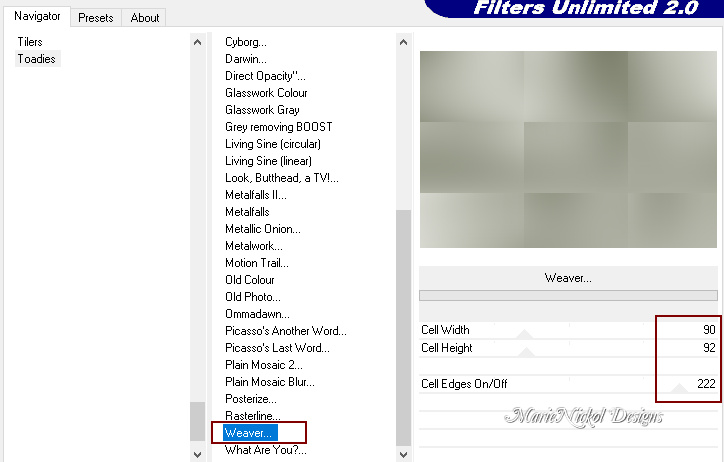
Effects - Edge Effects - Enhance
Step 7
Selections - Load/Save Selection - Load Selection From Disk
Look for and load the selection - mnfloralitysel_1
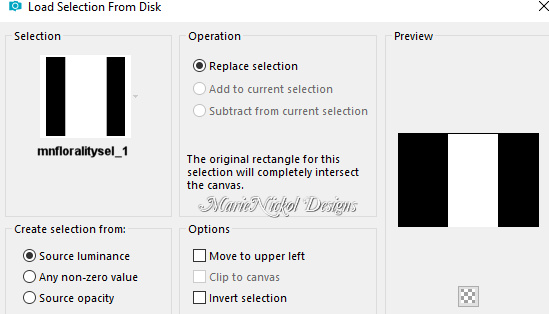
Selections - Promote Selection to Layer
Effects - Plugins - Carolaine and Sensibility - CS-Linear-H
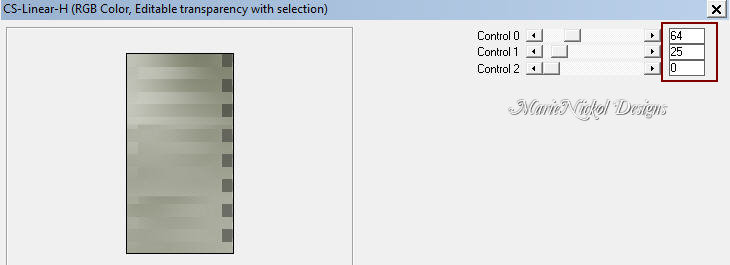
Selections - Select None
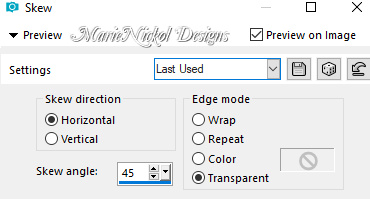
Effects - Geometric Effects - Skew
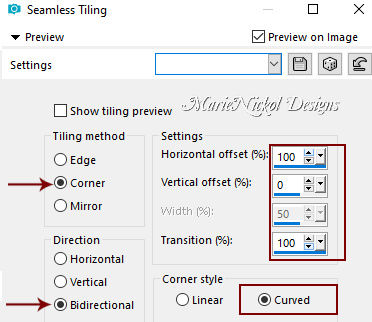
Effects - Image Effects - Seamless Tiling
In your Layer Properties - set the Blend mode to Multiply
Step 8
Activate the bottom layer - Raster 1
Selections - Load/Save Selection - Load Selection From Disk
Look for and load the selection - mnfloralitysel_2
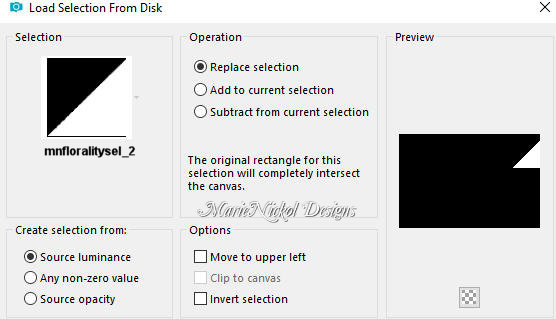
Selections - Promote Selection to Layer
Effects - Plugins - Carolaine and Sensibility - CS-LDots

Selections - Select None
In your Layer Properties - set the Blend mode to Hard Light
Step 9
Layers - Duplicate
Objects - Align - Bottom
Note: If you do not have the Command Objects on your version of PSP use the Pick Tool (K)
Activate the Pick Tool (K)![]() - Enter these values for positions X and Y on the Toolbar:
- Enter these values for positions X and Y on the Toolbar:
X 718.00 Y 421.00
![]()
Press M to release the Pick Tool
Step 10
Activate the bottom layer - Raster 1
Selections - Load/Save Selection - Load Selection From Disk
Look for and load the selection - mnfloralitysel_3
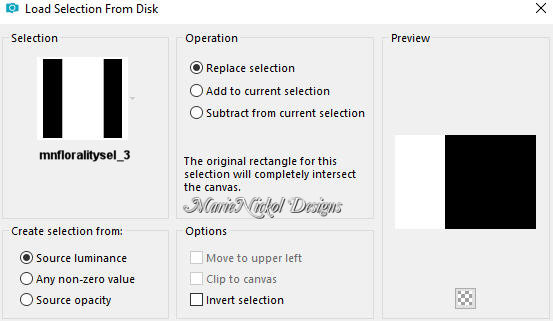
Selections - Promote Selection to Layer
Effects - Plugins - Tramages - Tow The Line

or imported in Filters Unlimited 2.0
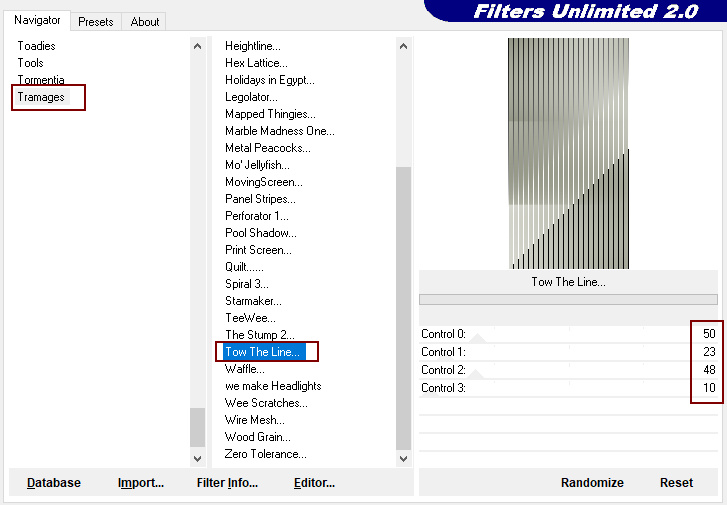
Selections - Select None
In your Layer Properties - set the Blend mode to Multiply
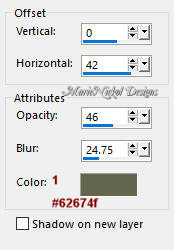
Effects - 3D Effects - Drop Shadow (0/42/46/24.75) color 1 ![]() #62674f - Shadow on new layer not checked
#62674f - Shadow on new layer not checked
Step 11
Activate the bottom layer - Raster 1
Selections - Load/Save Selection - Load Selection From Disk
Look for and load the selection - mnfloralitysel_4
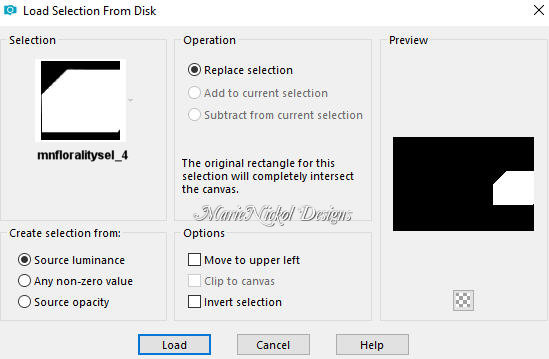
Selections - Promote Selection to Layer
Effects - Plugins - Tramages - Tow The Line (the same values as above)

Selections - Select None
In your Layer Properties - set the Blend mode to Hard Light
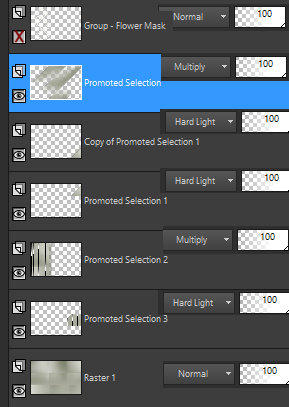
Your layers look like this:
Step 12
Activate the second layer from the top - Promoted Selection (below the Group-Flower Mask)
Layers - New Raster Layer
Flood fill tool /Fill in the Layer with the Background Color - color 2 ![]() #eeeee9
#eeeee9
Step 13
Open mask - Krystubes13
Layers - New Mask Layer - From Image (Invert mask data not checked)
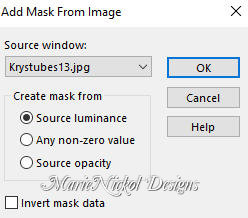
Duplicate 3 times
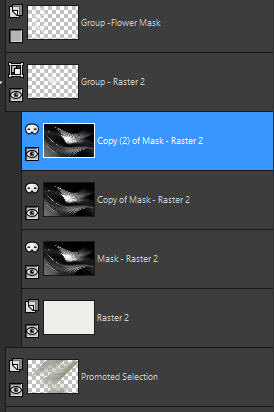
Layers - Merge - Merge Group
Image - Flip
Activate the Pick Tool (K)![]() - Enter these values for positions X and Y on the Toolbar:
- Enter these values for positions X and Y on the Toolbar:
X 60.00 Y -43.00
![]()
Press M to release the Pick Tool
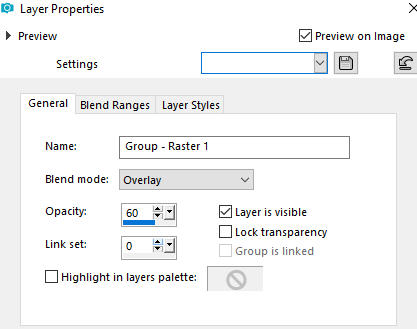
In your Layer Properties - set the Blend mode to Overlay and the Opacity to 60
Step 14
Activate the bottom layer - Raster 1
Selections - Load/Save Selection - Load Selection From Disk
Look for and load the selection - mnfloralitysel_5
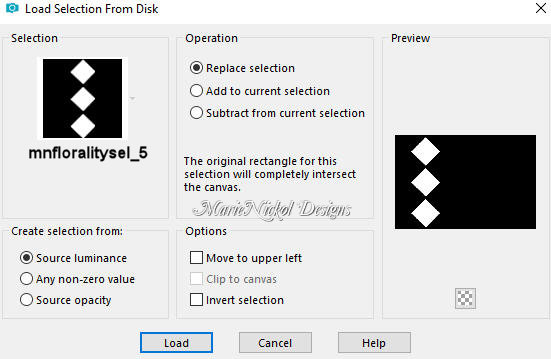
Selections - Promote Selection to Layer
Layers - Arrange - Bring to Top
Step 15
Layers - New Raster Layer
Flood fill tool /Fill in the Layer with the Foregound Color - color 1 ![]() #62674f
#62674f
Selections - Modify - Contract (Number of pixels 7)
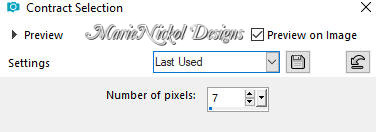
Press Delete on your keyboard
Selections - Select None
Layers - Merge - Merge Down
Close the eye of this layer
Step 16
Activate the third layer from the top - Group-Raster 2
Layers - Merge - Merge Visible
Now you have only three layers
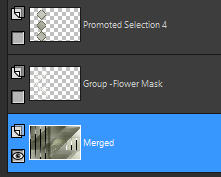
Step 17
Open the eyes of the top 2 layers - Promoted Selection 4 and Group-Flower Mask
Activate the top layer - Promoted Selection 4
Step 18
Layers - New Raster Layer
Selections - Load/Save Selection - Load Selection From Disk
Look for and load the selection - mnfloralitysel_6
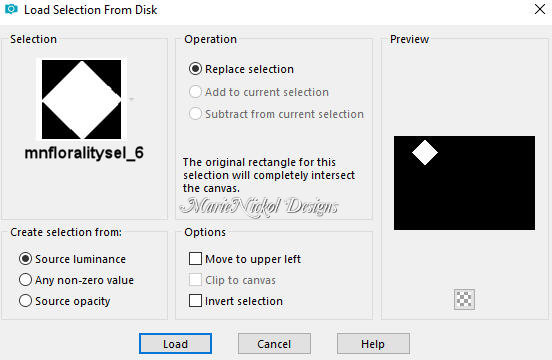
Open the misted tube - mnflorals
Edit - Copy
Edit - Paste - Paste into Selection on your working image
Don't close it - you will need it again
Step 19
Selections - Load/Save Selection - Load Selection From Disk
Look for and load the selection - mnfloralitysel_7
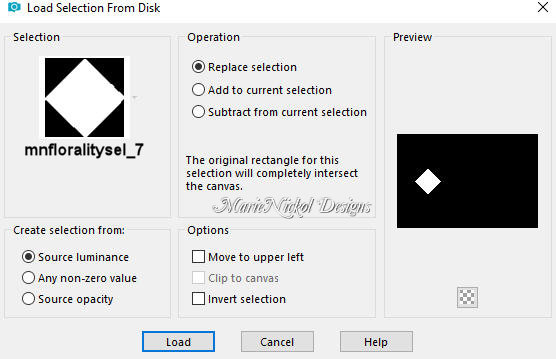
Activate the misted tube - mnflorals
Image - Mirror
Edit - Copy
Edit - Paste - Paste into Selection on your working image
Don't close it - you will need it again
Step 20
Selections - Load/Save Selection - Load Selection From Disk
Look for and load the selection - mnfloralitysel_8
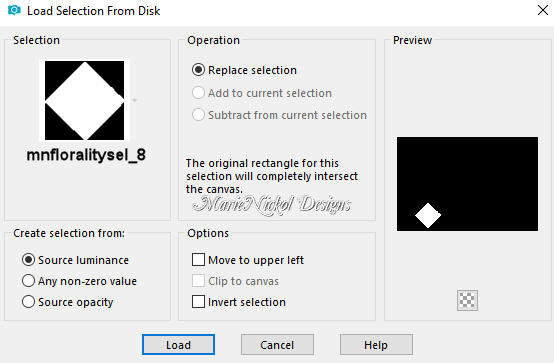
Activate the misted tube - mnflorals
Image - Mirror
Edit - Copy
Edit - Paste - Paste into Selection on your working image
Selections - Select None
You may close the tube - you will not need it anymore
Step 21
Layers - Merge - Merge Down
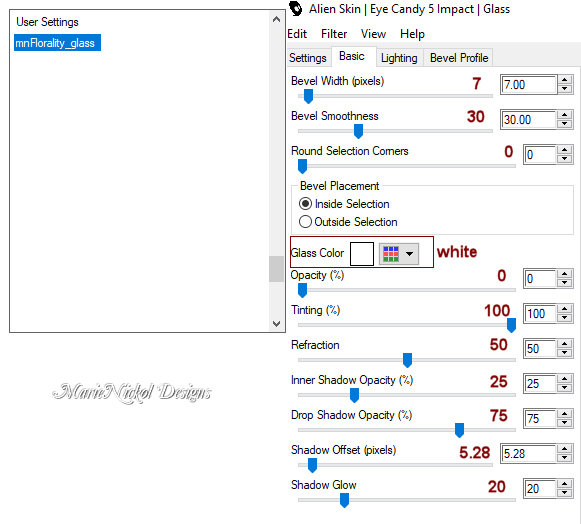
Effects - Plugins - Alien Skin - Eye Candy 5 - Impact - Glass
In the User Settings look for preset - mnFlorality_glass provided in the materials and click OK
Note: If the Preset doesn't work for you, use these settings in the Basic Tab:
Step 22
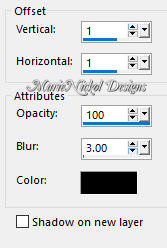
Activate the layer below - Group-Flower Mask
Effects - 3D Effects - Drop Shadow (1/1/100/3) color black #000000 - Shadow on new layer not checked
Step 23
Open the character tube - wieskes tube 1530
Edit - Copy
Edit - Paste - Paste As New Layer on your working image
Layers - Arrange - Bring to Top
Image - Mirror
Objects - Align - Right
Note: Position the tube to the right as shown on the final result
Effects - 3D Effects - Drop Shadow (0/0/73/26) color black #000000 - Shadow on new layer not checked
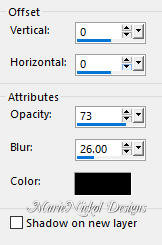
Note: Depending on your tube you may apply a Drop Shadow to your own preferences
Step 24
Image - Add Borders - 1 px - Symmetric checked color 1 ![]() #62674f
#62674f
Image - Add Borders - 5 px - Symmetric checked color 2 ![]() #eeeee9
#eeeee9
Image - Add Borders - 1 px - Symmetric checked color 1 ![]() #62674f
#62674f
Step 25
Selections - Select All
Image - Add Borders - 30 px - Symmetric checked color white
Selections - Invert
Flood fill tool / Fill in the layer with the Radial Style gradient prepared above - Angle 90 and Repeats 10

Adjust - Blur - Gaussian Blur (Radius 73)

Layers - New Raster Layer
Effects - 3D Effects - Cutout
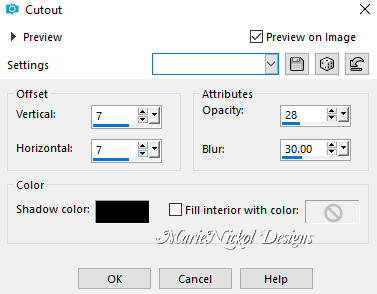
Layers - New Raster Layer
Repeat - Effects - 3D Effects - Cutout (negative values)
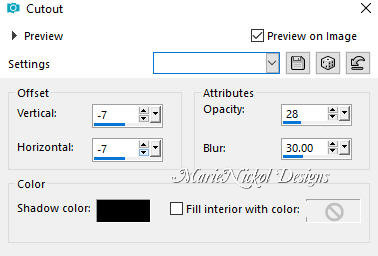
Selections - Select None
Image - Add Borders - 1 px - Symmetric checked color 1 ![]() #62674f
#62674f
Step 26
Layers - New Raster Layer
Add your name or watermark
Layers - Merge - Merge All (Flatten)
Image - Resize - 900 pixels width (the height will adapt)
File - Export - Save as JPG file
***
I hope you enjoyed this tutorial.
If you do this tutorial, please email your version to me
~~~~~~~~~~
My second version in different color
Tube used woman by Jolcsi
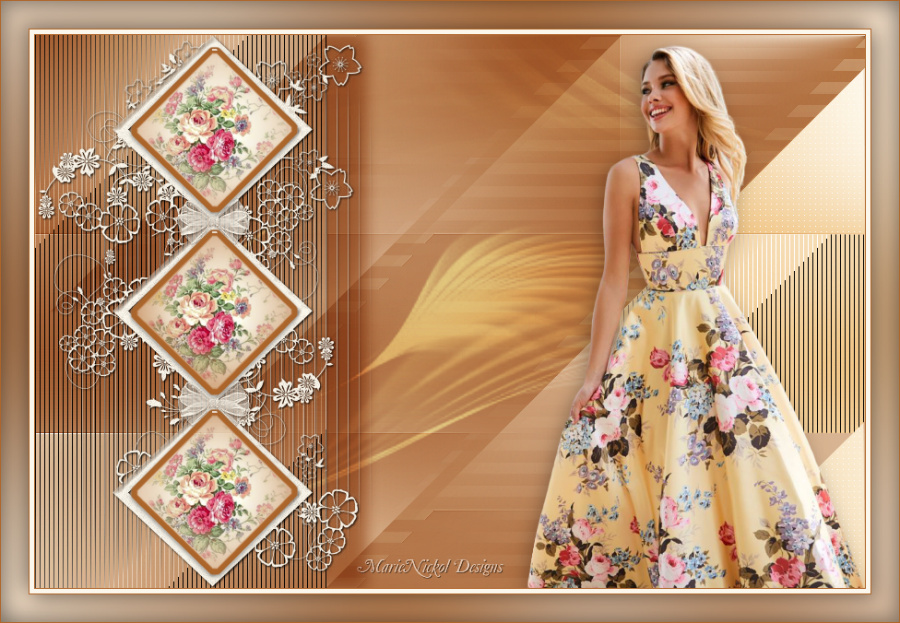
~~~~~~~~~~
Your Versions
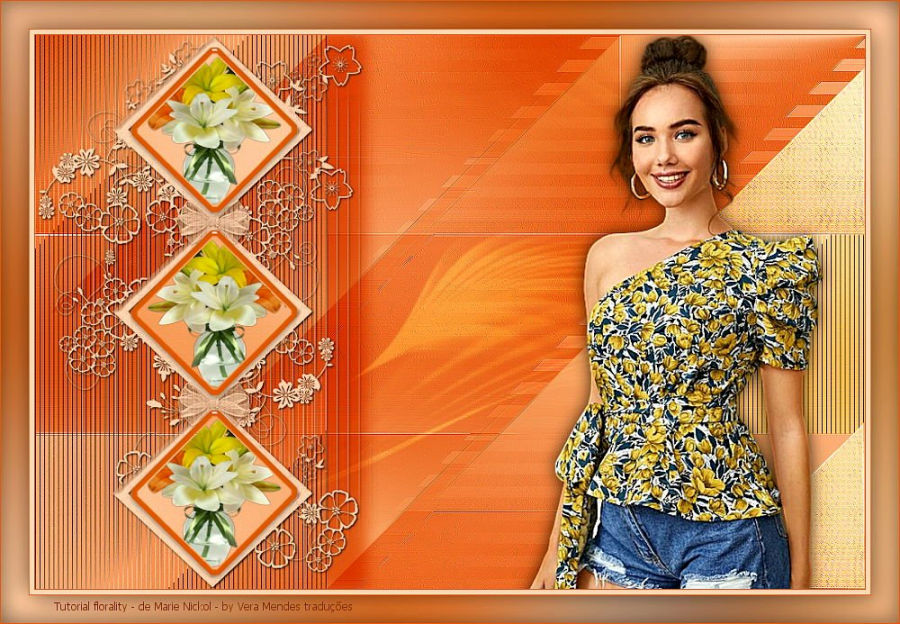
Thank you so much Vera for your beautiful creations!
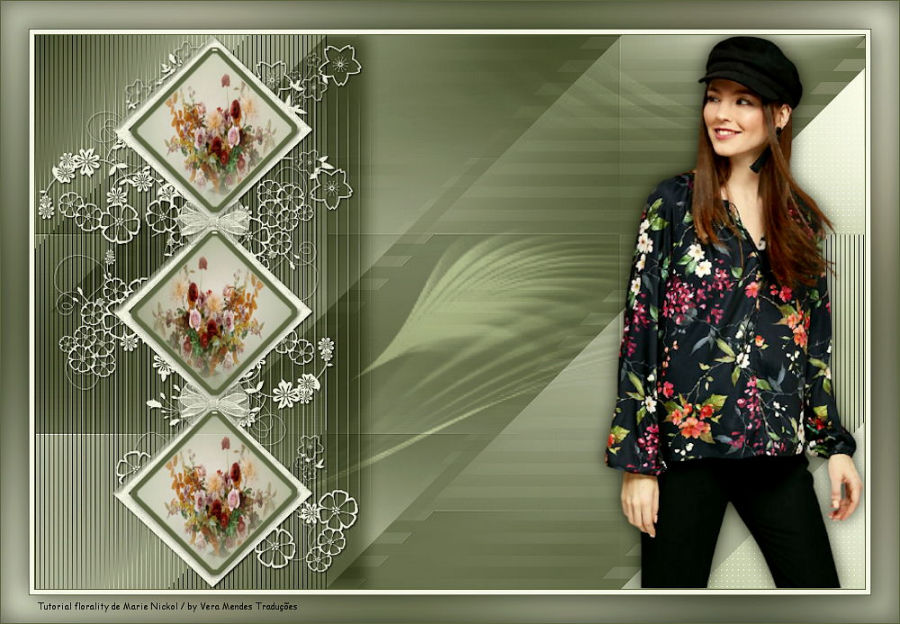
~~~~~~~~~~
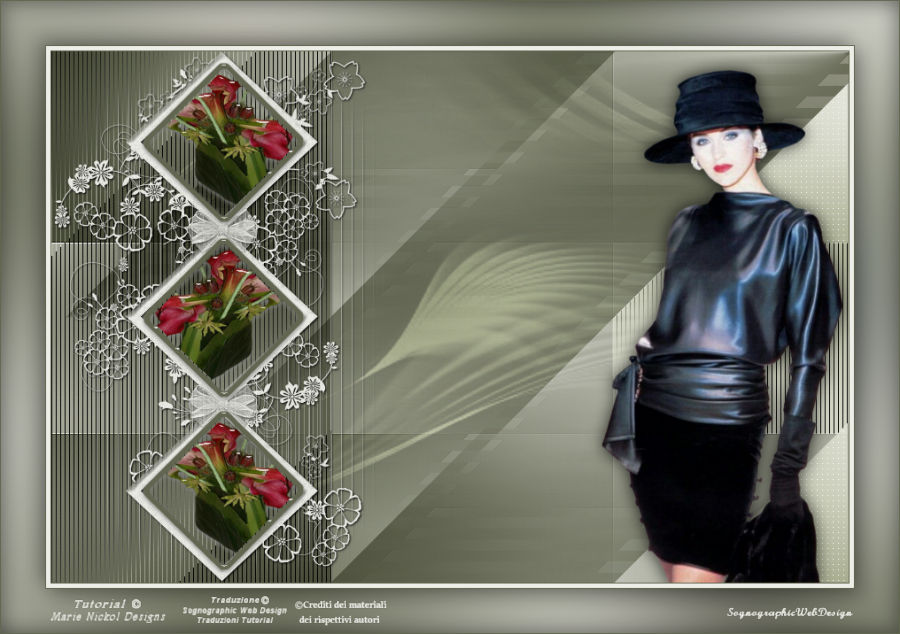
Thank you so much Isabella (Sognografica) for your beautiful version
~~~~~~~~~~
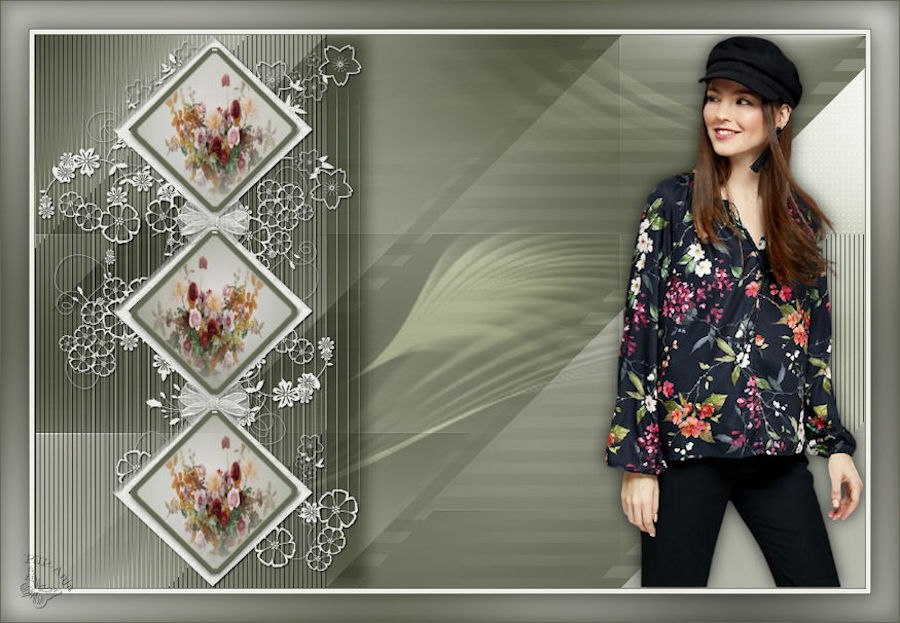
Thank you so much Anja for your beautiful creation!
~~~~~~~~~~
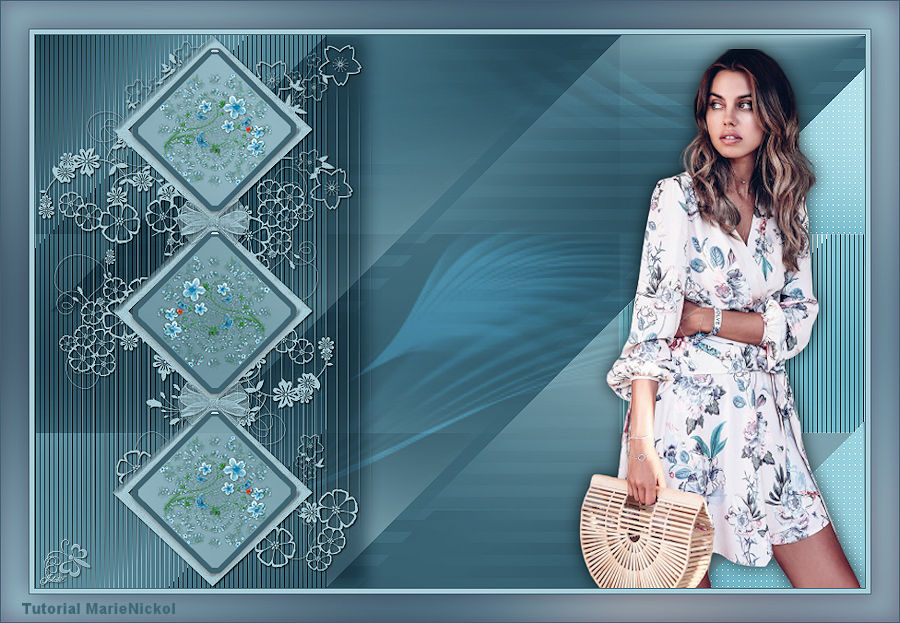
Thank you so much Jolcsi for your beautiful creation!
~~~~~~~~~~
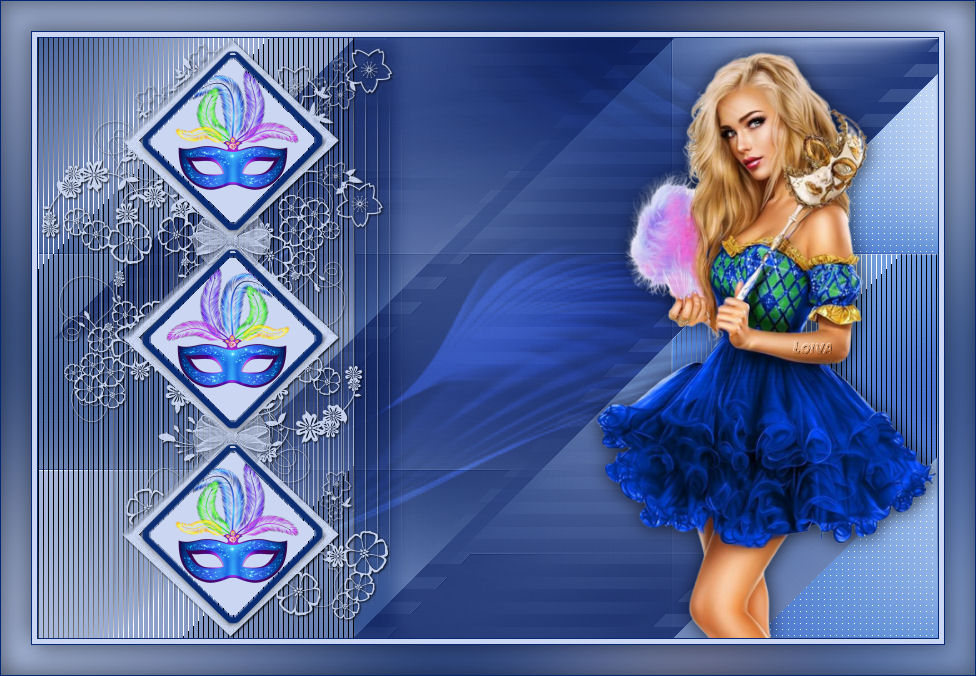
Thank you so much Loiva for your beautiful creation!
~~~~~~~~~~
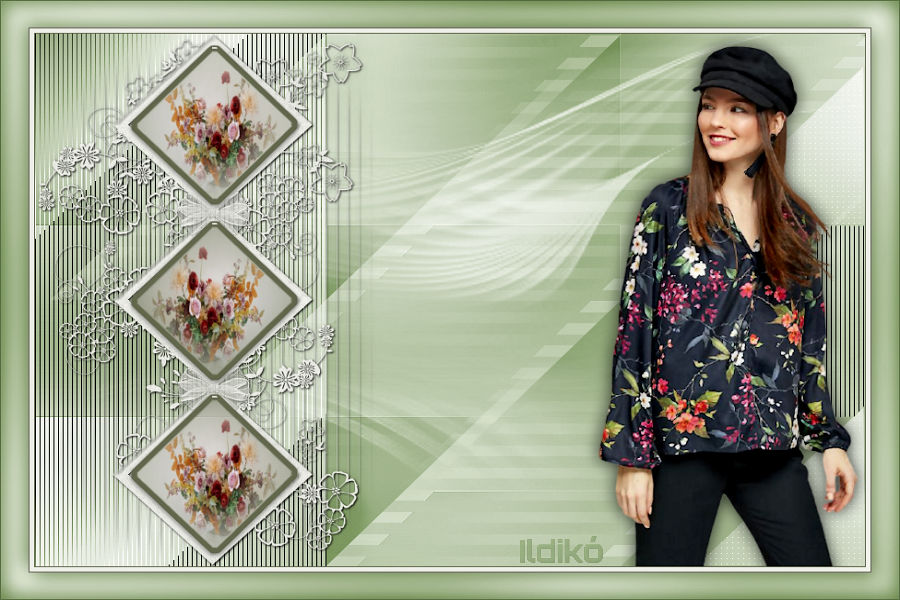
Thank you so much Ildiko for your beautiful creation!
~~~~~~~~~~
1 2

